Understanding Running Zones: The Key to Smarter Training
If you’ve been running for a while or just started diving into structured training, you’ve likely heard of running zones. They sound technical—and they can be—but once you understand them, they can completely transform your running journey.
This blog will break down running zones, explain why they matter, and how to use them to improve your performance and avoid burnout.
What Are Running Zones?
Running zones are heart rate or effort-based intensity levels used to structure your training. Each zone corresponds to a percentage of your maximum heart rate or your perceived exertion. By training in different zones, you target specific physiological adaptations like fat burning, aerobic capacity, or speed.
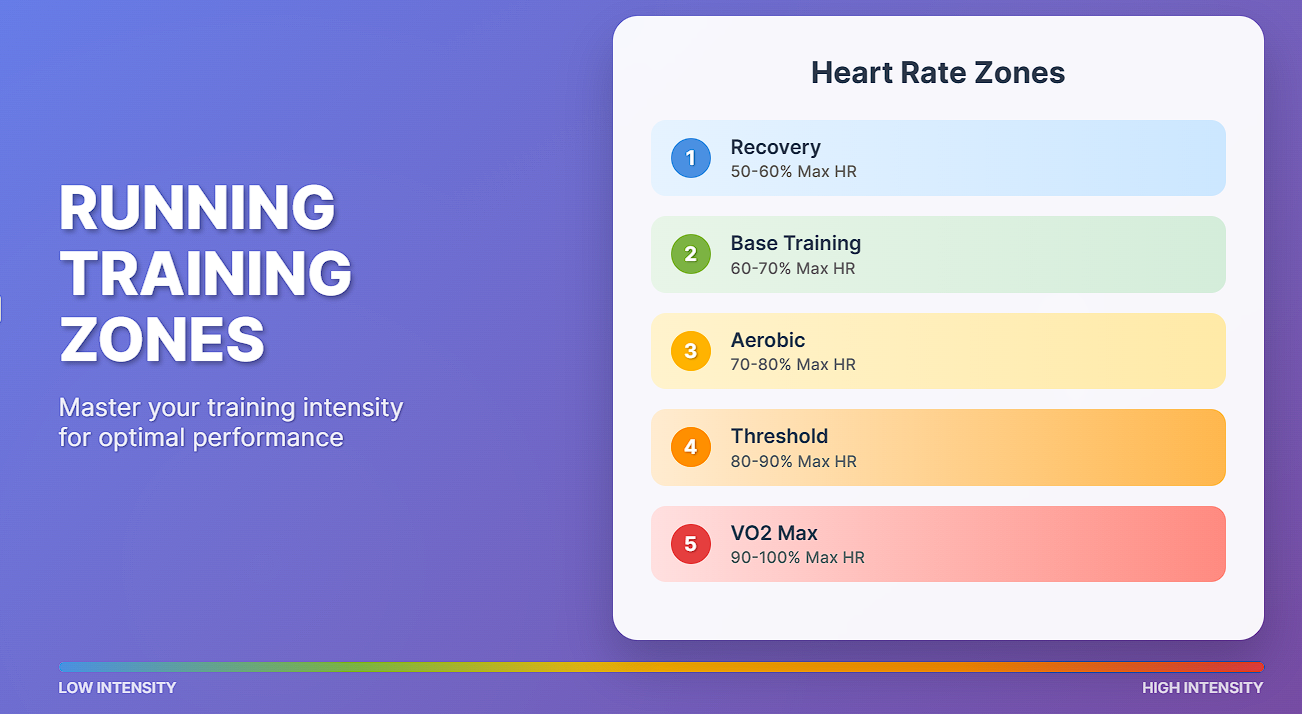
The 5 Heart Rate Running Zones
Let’s break them down:
Zone 1: Recovery / Very Easy (50–60% of Max HR)
-
Feeling: You can easily hold a conversation. Very light effort.
-
Purpose: Active recovery, warm-ups, and cooldowns.
-
Use it when: You need to recover from hard runs or stay in motion without adding stress.
Zone 2: Easy / Aerobic (60–70% of Max HR)
-
Feeling: Comfortable, relaxed pace.
-
Purpose: Builds endurance, burns fat efficiently.
-
Use it for: Long runs and base-building phases. Most training (especially for beginners) should be in this zone.
Zone 3: Moderate / Tempo (70–80% of Max HR)
-
Feeling: Slightly uncomfortable, but sustainable.
-
Purpose: Improves aerobic fitness, muscular efficiency.
-
Use it for: Tempo runs or steady-state efforts. Great for improving your ability to hold a strong pace over longer distances.
Zone 4: Hard / Threshold (80–90% of Max HR)
-
Feeling: Hard effort, talking is difficult.
-
Purpose: Increases lactate threshold, enhances race pace performance.
-
Use it for: Interval workouts, tempo bursts, and race simulations.
Zone 5: Maximum Effort (90–100% of Max HR)
-
Feeling: All-out, can only sustain for short periods.
-
Purpose: Builds speed and power, trains your VO2 max.
-
Use it for: Sprint intervals, hill repeats, short speed workouts.
Why Training in Zones Matters
Training without understanding your zones is like running in the dark. Here’s why zone-based training is smart:
-
✅ Avoids overtraining: Many runners unknowingly spend too much time in Zone 3—the “grey zone”—that’s too hard to recover from but not hard enough to build speed.
-
✅ Targets specific goals: Want to get faster? Use Zone 4. Want to burn fat and go longer? Zone 2 is your friend.
-
✅ Promotes recovery: Strategic use of Zones 1 and 2 allows your body to recover while staying active.
-
✅ Improves efficiency: You get more out of each run by aligning effort with purpose.
How to Calculate Your Zones
The most accurate way is through lab testing, but here’s a simple estimate:
-
Estimate your Max Heart Rate (MHR)
MHR = 220 – your age(not perfect, but it works as a starting point) -
Use percentages to define zones
For example, if you’re 30 years old:-
Max HR = 190
-
Zone 2 (60–70%) = 114 to 133 bpm
-
Pro Tip: Use a heart rate monitor or running watch for accuracy. If you don’t have one, use Rate of Perceived Exertion (RPE) on a 1–10 scale.
Sample Weekly Zone-Based Training Plan
| Day | Run Type | Zone |
|---|---|---|
| Monday | Rest or easy jog | Zone 1 |
| Tuesday | Intervals | Zone 4–5 |
| Wednesday | Easy Run | Zone 2 |
| Thursday | Tempo Run | Zone 3 |
| Friday | Rest or cross-train | Zone 1–2 |
| Saturday | Long Run | Zone 2 |
| Sunday | Recovery Run | Zone 1 |
Final Thoughts
Understanding and using running zones isn’t just for elite runners—it’s for anyone who wants to train smarter, not harder. Whether you’re aiming for a 5K or a marathon, zone-based training will help you build a solid aerobic base, improve your speed, and reduce injury risk.
So next time you lace up, ask yourself: What’s the goal of this run? Then choose your zone wisely.


Super Informative!!